
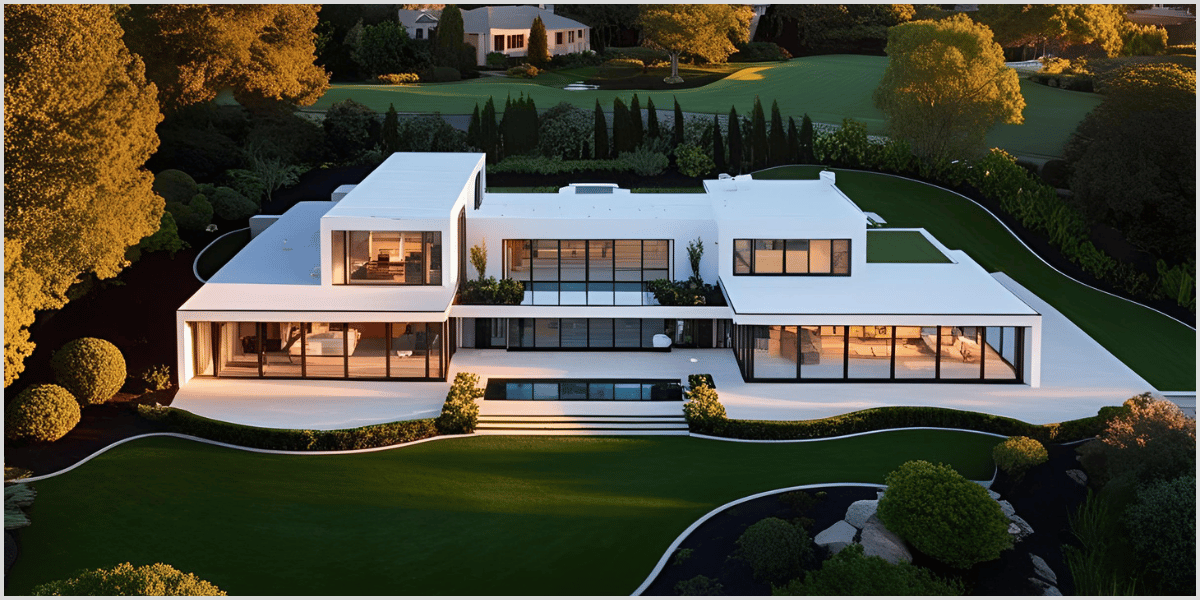
A stunning dusk shot can make a $300,000 house look like a million-dollar dream. That warm glow in the windows, the deep blue sky, the lights reflecting off the driveway. Buyers stop scrolling for that. The problem is, real twilight only lasts for about 20 minutes, and shooting every listing at that exact moment is impossible.
That is why day to dusk conversion is one of the most profitable skills in real estate photo editing today.
This guide will walk you through exactly how to edit day to dusk images for real estate like a pro, from picking the right daylight photo to delivering a final image that looks natural, not fake.
What Is Day to Dusk and Why It Sells Homes
Day to dusk, also called twilight conversion or day to twilight, is the process of taking a bright daylight photo of a property and digitally transforming it into a beautiful evening shot.
In real estate marketing, this is not just a creative effect. It is psychology.
A daylight photo says, here is the house. A dusk photo says, here is your home. The warm lights inside suggest comfort, safety, and family. The cool twilight sky creates contrast and drama that makes the property pop on MLS, Zillow, and Instagram. Studies by listing platforms have repeatedly shown that twilight images get significantly more clicks and saves than standard daylight images. For luxury properties, it is almost expected.
Photographers used to try to shoot this for real. They would wait until 7:30 PM, rush to get 2-3 shots while the light was perfect, battle mosquitoes and fading light, and hope the interior lights were on. Now, with advanced editing, we can create that same magic from a 2 PM photo, consistently and with full control.
What Makes a Perfect Source Image for Conversion
Not every daylight image will convert well. If you start with the wrong photo, no amount of Photoshop will save it. Before you even open Lightroom, learn to select.
The best candidates have a clear, interesting sky, even if it is blown out white. You will replace it anyway, but you need clean edges around the roofline. Avoid images with heavy tree branches cutting across the sky in complex ways if you are a beginner, because masking them takes hours.
Look for images where the front of the house is not in harsh, patchy shadow. Soft, even daylight is ideal. If one side of the house is completely black because of the sun angle, creating believable light later becomes very difficult.
You also need visible windows. The whole point of a dusk image is that warm window glow. If the windows are blown out or have heavy reflections of trees, you will need to rebuild them. An image with dark, see-through windows where you can see some interior detail is perfect.
Finally, always shoot in RAW. A JPEG has already thrown away 80 percent of the color data you need to pull down highlights and push shadows for a twilight look. If you are editing for clients and they send you JPEGs, you can still do it, but RAW gives you so much more flexibility.
Common Mistakes That Make Dusk Edits Look Fake
Most bad day to dusk edits fail for the same five reasons. If you avoid these, you are already better than 90 percent of editors on Fiverr.
First, the sky is too saturated and too light. Real twilight sky is a deep, desaturated navy blue, not electric royal blue. It should be darker at the top and slightly lighter near the horizon.
Second, the house stays too bright. During twilight, the ambient light is low. The house itself should be darker than it was during the day. Many beginners leave the house at daylight brightness and just slap a dark sky behind it. It looks like a bad collage.
Third, white windows. Beginners forget to add the warm interior glow. At dusk, every window that has a room behind it should emit a warm, yellow-orange light. Without it, the house looks abandoned.
Fourth, no lights are turned on. Exterior wall sconces, porch lights, pathway lights, pool lights, even the street lamps. All of these should be glowing. That is what sells the evening mood.
Fifth, overdoing it with fake reflections and lens flares. A subtle reflection of the house lights on a wet driveway or a pool can be beautiful. But adding 20 lens flares and making the lawn glow neon makes it look like a cartoon.
Realism is everything. The best compliment for your edit should be, what time did you shoot this.
Tools You Actually Need
You do not need 10 different software programs. The professional workflow used by top studios including our team at PixelShouters relies on just two.
Adobe Lightroom or Camera Raw for the base color and light corrections. And Adobe Photoshop for masking, sky replacement, and light effects. You can also use Luminar or Affinity Photo, but Photoshop gives you the most control over luminosity masks and blending.
You will also need a good library of high quality twilight skies. Do not use a single sky for every image. You need about 15 to 20 different skies, some with subtle clouds, some clear, some with a hint of sunset color near the horizon. Build your own library by photographing the sky at twilight, or buy a licensed pack. Never pull skies from Google Images.
A calibrated monitor is also non negotiable. If your monitor is too bright, your dusk images will be too dark for everyone else.
How to Edit Day to Dusk Images Step by Step
This is the exact workflow we use at PixelShouters for our real estate photo editing clients. We process thousands of images every month, and this process keeps quality consistent.
Step 1: Prepare the Daylight Image
Open your RAW file in Lightroom. First, correct the basics. Enable lens corrections to fix distortion and vignetting. Straighten the verticals and horizontals. For real estate, walls must be perfectly vertical.
Then bring down the highlights to recover sky and roof detail, and lift the shadows just enough to see detail in the porch. Do not over HDR it. Set white balance to around 5500K to keep it neutral for now. Export as a 16 bit TIFF to Photoshop. You want maximum data.
Step 2: Create the Twilight Base
In Photoshop, duplicate your background layer. This will be your working layer.
Now you need to make the entire image feel like evening. Add a Curves adjustment layer. Pull the overall exposure down by about 0.7 to 1 stop. The image should get noticeably darker. Then in the Blue channel of Curves, lift the shadows slightly. This adds that cool blue tone that is characteristic of twilight.
Next, add a Color Balance adjustment layer. Push Shadows towards Blue and Cyan, Midtones slightly towards Blue, and keep Highlights neutral for now. This creates the base evening atmosphere. Lower the opacity of these layers to around 70 to 80 percent so it does not look too heavy. The house should look like it is in shade, not at night.
Step 3: Replace the Sky
This is where the transformation happens.
Use Select Sky in Photoshop, or use the Quick Selection tool plus Select and Mask to carefully select the sky. For clean rooflines, Select Sky works great. For trees, you will need to go into Select and Mask and use the Refine Edge brush on the leaves.
Once you have a good selection, feather it by 1 to 2 pixels. Put the selection on its own layer mask on a group. Inside that group, place your new twilight sky image. Scale and position it so the horizon line makes sense. The sky should have some variation, not be a flat color.
Crucially, match the sky brightness to your base. A common pro trick is to add a Curves layer clipped to the sky layer and bring down its brightness. Also add a slight Gaussian blur of 0.5 to 1 pixel to the sky if it looks too sharp compared to the house. Real twilight photos are rarely tack sharp in the sky because of low light.
Add a Gradient on the sky layer mask from dark to light at the bottom, so the sky blends more naturally near the horizon and picks up a tiny bit of warm glow if your sky has sunset color.
Step 4: Create the Warm Window Glow
This is what makes or breaks the image.
Create a new blank layer set to Soft Light or Screen. With a soft brush set to 30 percent opacity, pick a warm color like #FFB26B or #FFC78A. Carefully paint inside each window pane. You need to stay inside the window frames. Use the Pen tool to make precise selections for each window if you want clean results.
Do not make all windows the same brightness or same color. Vary it slightly. A living room might be a warmer, brighter yellow. A bedroom might be slightly dimmer. Leave one or two windows dark to suggest realism, not every single light in a house is on.
After painting the color, duplicate that layer and set it to Color Dodge or Linear Dodge at 10 to 15 percent opacity to create the actual glow. Then add an Outer Glow layer style with a warm orange color, size around 20 to 40 pixels, very subtle. This makes the light feel like it is spilling out.
If the original window had interior detail, lower your paint opacity so some detail still shows through. If it was blown out white, you are essentially rebuilding the window from scratch.
Step 5: Turn On All Exterior Lights
Go through the image and turn on every logical light source.
For wall sconces, porch lights, and garage lights, create a new layer set to Screen. Paint a small warm dot where the bulb should be. Then add an Outer Glow and a Inner Glow. Create a larger soft brush stroke below the light on the wall to simulate light falloff. Real lights cast light downwards in a cone shape.
For landscape lights and pathway lights, do the same. Small warm glows along the pathway. If there is a pool, it should have a bright blue aqua glow inside. Paint it on a Soft Light layer with a turquoise color.
For the driveway and sidewalk, add very subtle reflections of these lights. Create a new layer, sample the light color, paint a soft streak on the pavement where a reflection would be, then lower opacity to 10 to 20 percent and add Motion Blur. This detail is subtle but adds immense realism.
Step 6: Add Ambient Light on the House
The interior lights and exterior lights should now be casting light onto the house itself. At dusk, the walls near a porch light are not blue, they are warm from the bulb.
Create a new Soft Light layer. With a large soft brush at 15 percent opacity, paint warm orange on the walls around each exterior light, under the eaves, on the porch ceiling, and around window frames. This is called light wrapping. It connects the light source to the environment.
Then paint a very faint cool blue light from the sky onto the roof and shadow areas. This reinforces that the main light source now is the sky, not the sun.
Step 7: Work on the Landscape and Details
The lawn, trees, and driveway should not be daylight bright. Use a Curves layer with a mask to darken the lawn slightly and shift it towards a cooler green. The grass at twilight is not neon green.
If there are trees with sky behind them, make sure your sky replacement shows through the small gaps in leaves. This takes time with Select and Mask but is worth it.
Add a subtle vignette, darker at the corners, to draw focus to the house. Most twilight shots have natural vignetting anyway.
Finally, look at the overall contrast. Twilight has lower contrast than daylight. Slightly lift the blacks so they are not pure black. This makes it feel like there is still ambient light in the air.
Step 8: Final Polish and Color Grading
Zoom out to 25 percent and look at the whole image.
Add a final Color Lookup or Color Balance layer. A popular grading for dusk is to keep shadows cool blue and highlights warm orange. This complementary color scheme is pleasing and cinematic.
Sharpen carefully. Use Unsharp Mask at low amount, around 60, radius 0.8. Do not over sharpen, because twilight photos have a softer feel.
Check for halos around the roofline, leftover fringes from sky selection, and color spill. Fix any magenta or green color casts on white trim.
Save your master file as PSD, then export a JPEG at 3000px long edge, quality 80 to 90, in sRGB for MLS. Keep your sky library and your window glow brushes organized, because speed comes from assets.
Pro Tips to Make Your Dusk Edits Stand Out
Once you have the basics, these small touches separate an average edit from a premium one.
Add a very faint cloud reflection in the windows. At dusk, windows reflect the sky. Lower the opacity of your sky and overlay it slightly in the window glass at 10 percent.
Do not make the sky the same for every house orientation. If the front of the house faces west, you can keep a bit more orange and pink near the horizon. If it faces east, the sky should be a deeper, more uniform blue with almost no sunset color. This level of realism is what agents notice.
Keep the lights consistent in color temperature. All warm lights should be around 2700K to 3200K. If you make one window pure yellow and another orange red, it looks messy.
Use dodge and burn on the house to bring back dimension. At dusk, the house still has shape. Lightly dodge the edges that would catch the sky light, and burn the deep eaves.
And always, always look at real twilight photos for reference. Keep a folder of 20 real dusk shots you love. Before you finish an edit, compare your work to a real photo. Does your brightness match, does your color match.
Doing It Yourself vs Hiring a Professional Service
Let me be honest with you. A perfect day to dusk conversion done right takes an experienced retoucher 20 to 45 minutes per image. If you are learning, it can take two hours. If you are a real estate photographer shooting 5 houses a day, you simply do not have time to do this for every listing.
That is why most busy photographers and agents outsource this specific edit.
This is exactly why we built PixelShouters. We are a dedicated real estate photo editing company focused only on real estate. Day to dusk conversion is one of our core specialties, along with HDR blending, flambient, virtual staging, and sky replacement.
Unlike general editing marketplaces, we understand real estate. We know that the lawn cannot be blue, the window glow cannot look like a sticker, and the sky must fit the architecture. We have trained our team on hundreds of thousands of real estate images, so we deliver natural, MLS ready dusk images that actually help listings sell, not just look pretty on Instagram.
We offer a 24 hour turnaround, affordable per image pricing, and we work with RAW files. You can send us a batch at 10 PM after a long shoot and have beautiful twilight images ready for your client by morning. Many of our photographer clients add 50 to 100 dollars extra per listing just for including one hero dusk shot, so it becomes a direct profit center.
If you enjoy editing and want full creative control, learn the workflow above and master it. It is an incredibly valuable skill. But if you want to scale your business, save your evenings, and ensure every single dusk image is consistent, outsourcing to a specialist team like PixelShouters is the smartest move.
Final Checklist Before You Deliver
Before you send that dusk image to a client, run through this quick checklist.
Is the sky realistic and not over saturated. Is the house darker than the daylight version. Is every logical interior window glowing warm. Are all exterior lights turned on with proper light spill on the walls. Are there subtle reflections on the driveway or pool. Is the lawn still green but not neon. Are there any selection halos around trees or roof. Does the image still look like the same house.
If you can answer yes to all of those, you have a winner.
Day to dusk editing is part technical skill, part art. It is about understanding light. The sun is gone, the sky is your main light, and every warm bulb in that house becomes a small sun of its own. When you balance those two light sources correctly, you create an emotional image that daylight can never match.
Practice on 10 different houses. Save your layers and build a template. Over time you will get faster. And when you have more work than hours in the day, you know where to find us at PixelShouters to help you keep that quality high without the burnout.


Write a comment ...